Chat Configuration
You can now configure custom chat settings for specific departments within your organization using Twixor EnCaps. This allows you to tailor the chat experience for different teams while keeping the maximum load on agents consistent across all departments.
Chat Widget Configuration
Follow these steps to configure the chats.
1. First head to Configuration -> Chat Config.
2. To configure the custom chats, tap Chat Config option.
3. Under “Enterprise Level Configuration”, key in the maximum number of chats an agent can pick up simultaneously from the queue in Max load on agent.
4. Under “Department Level Configuration”, select the department for which you want to configure custom chat settings.
- Specify the time limits for which the customer should wait in the call queue in Chat timeout. If they are staying in the queue more than the specified time frame, the chat will be considered as a Missed chat. For example, if you set the Chat timeout as 20 seconds, chat request waiting in the chat queue for more than 20 seconds will be missed out. Missed chats on the same day, can be picked up by the agent from Real Time Monitor or from the Live chat window to resume it again.
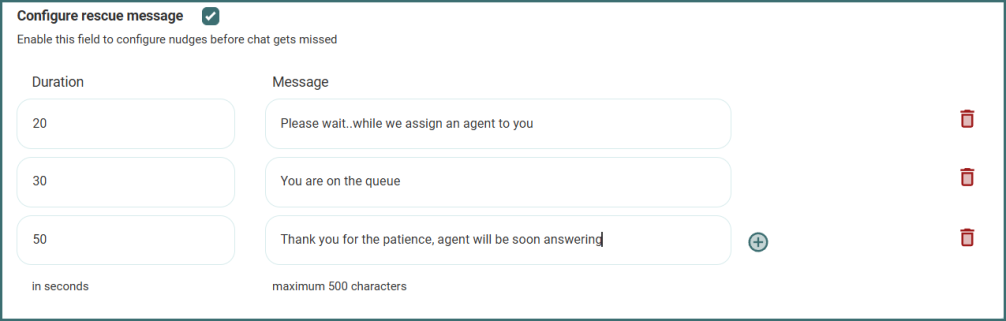
5. During the chat timeout period, you can send the nudge messages to keep the customer engaged by using the "Configure Rescue Message" option. This allows you to set the duration and content of nudge messages that will be sent to the customer.
Info! You are allowed to send a maximum of 5 nudges, and each nudge message can have up to 500 characters.
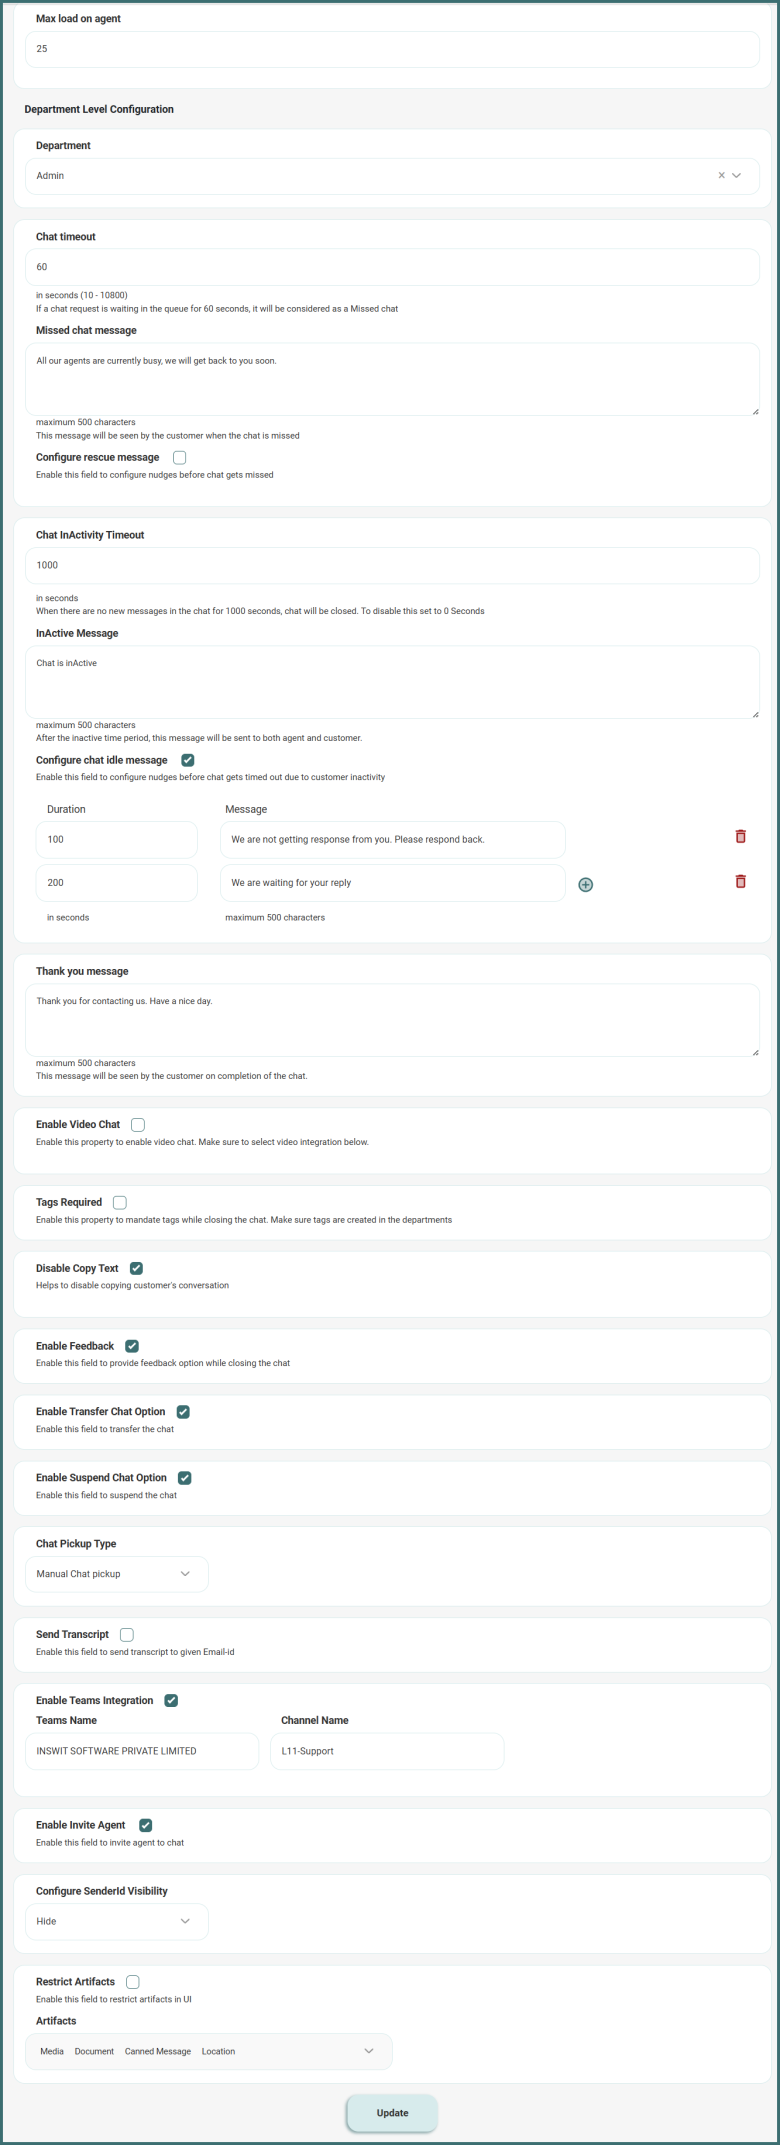
- Enter the chat inactivity timeout (in seconds) to make the chat inactive and close a chat after a pre -defined amount of time if the customer has not replied for some time . Also, if the Inactivity Timeout is set as ZERO, the chat will never be timed out, even when the customer does not respond.
- During the chat inactivity period, you can send the nudge messages to the customer if they are not active during the conversation using the "Configure chat idle message" option. This allows you to set the duration and content of nudge messages that will be sent to the customer.
-
Info! You are allowed to send a maximum of 5 nudges, and each nudge message can have up to 500 characters.
The timing for sending nudges should be within the chat timeout duration. Type the InActive message sent to both the agent and the customer after the set inactive period.
- In Thankyou message, type in the pleasing message to be displayed after a chat is completed.
-
To enable video chat property, select the video integration from the drop-down which you have configured in the integration page.
-
Enable Tags Required check box to make the tags mandatory (in Additional notes) while closing the chat. This property will help you search your customer in chat history.
-
Turn on Disable Copy Text check box to disable copying customer's conversation.
Info! Create your tags in Admin -> Manage Department section.
-
Turn on Enable Feedback check box to let agents decide if they want to close a chat with feedback. This prompts customers to give a rating when the chat ends.
After agents close the chat in the chat conversation window, customers receive a feedback request for that particular chat.
- Turn on Enable Transfer Chat Option check box to let agent can transfer the chat to other agents or department.
-
Turn on Enable Suspend Chat Option check box to let agent can suspend a specific chat if it is becoming too late for him/her to respond when he/she is being out or away from the computer for a short time.
-
Select the "Chat Pickup Type" as either Manual Chat Pickup or Auto Chat Pickup:
Manual Chat Pickup: Allows agents to manually pick up chats as needed.
Auto Chat Pickup: Automatically assigns incoming chats to agents based on the selected configuration.
If Auto Chat Pickup is selected:
From the "Select Default Chat Pickup Agent" section, choose the agent’s name from the relevant department to handle chats.
Alternatively, enable the Round Robin method, where incoming chats are assigned to agents automatically based on their current workload and the number of active chats they are handling. These chats are categorized and come under "Assigned Chats."
Operational Hours Configuration
Customers need to be informed when your agents go offline or when your business is closed. This feature allows agents to configure specific working hours and chats requests that fall post operational hours will automatically be rejected.
Follow these steps to set the variable working hours for the agent:
- Click the Operational Hours tab under Chat Configurations.
- Tap Enable Operational Hours.
- Enter the variable work timings the agents work in a week from Sunday to Saturday.
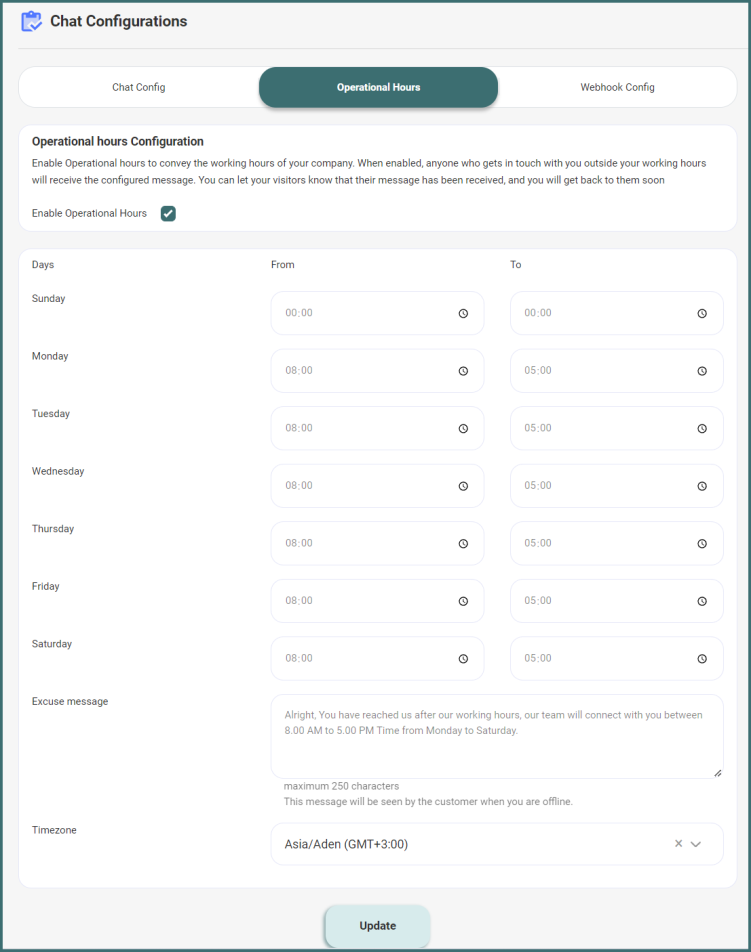
- Enter the start and end working time respectively in From and To.
- Type the Excuse message that will be displayed to the customers if the chats are initiated before or after the pre-set operational hours.
- Select the timezone from the list of available zones across the world.
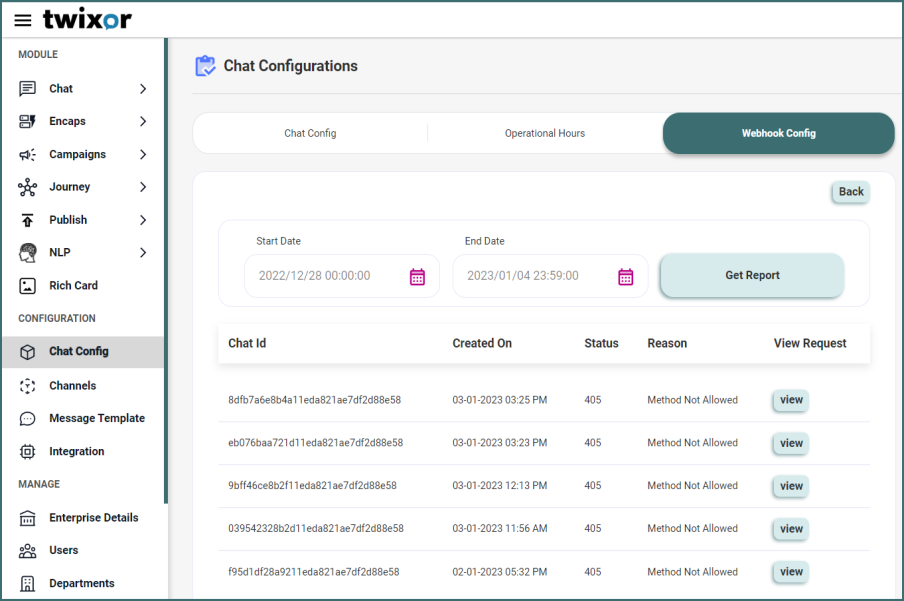
Webhook Configuration
In the Webhook config page, you can send the entire chat conversation data to any third-party system using Webhook URL with their key-value headers.
1. Turn ON Enable Webhook Config toggle button.
2. Add the Webhook URL
3. Click Add button and give the Key and Value for the header manually in this editor.
4. Click Save.

By clicking View webhook logs, choose start and end date to get the report of chat id, created date, and status for each chat ids.
If the Status is 405, then the webhook is not configured successfully
If the Status is 200, then the webhook is configured successfully.